

Automate Pro Tools plugins by enabling automation mode and writing parameter envelopes in Edit or Mix.
I have spent years mixing and producing with Pro Tools, and I will guide you through every step of how to automate a plugin in Pro Tools with clear, practical instruction. This article explains modes, automation lanes, writing and editing envelopes, and handling third-party plugins so you can automate effects and instrument parameters confidently and efficiently.

Why automate plugins in Pro Tools?
Automation makes mixes move. It lets you change plugin settings over time so effects respond to the song. Automating plugins saves time and delivers dynamic, polished mixes.
Automating allows precise changes to gain, EQ, reverb, delay, filter sweeps, and synth parameters. When you understand how to automate a plugin in Pro Tools, you can create professional transitions, fix balance problems, and add interest to static tracks.

Preparing your session before automation
Keep your session tidy. Name tracks. Color-code groups. Save a backup before heavy automation work.
Set buffer size low for good responsiveness if you plan to write automation in real time. Freeze or commit CPU-heavy tracks if Pro Tools struggles. If you plan to automate third-party plugins, make sure they are up to date and stable.

Step-by-step: How to automate a plugin in Pro Tools
Below is a clear, stepwise workflow for how to automate a plugin in Pro Tools. Follow these steps whether you use stock AAX plugins or third-party instruments.
- Insert the plugin
- Insert the plugin on the track’s Insert slot in the Mix or Edit window.
- Choose the automation parameter
- Open the plugin and identify the parameter you want to automate, such as Wet/Dry, cutoff, or threshold.
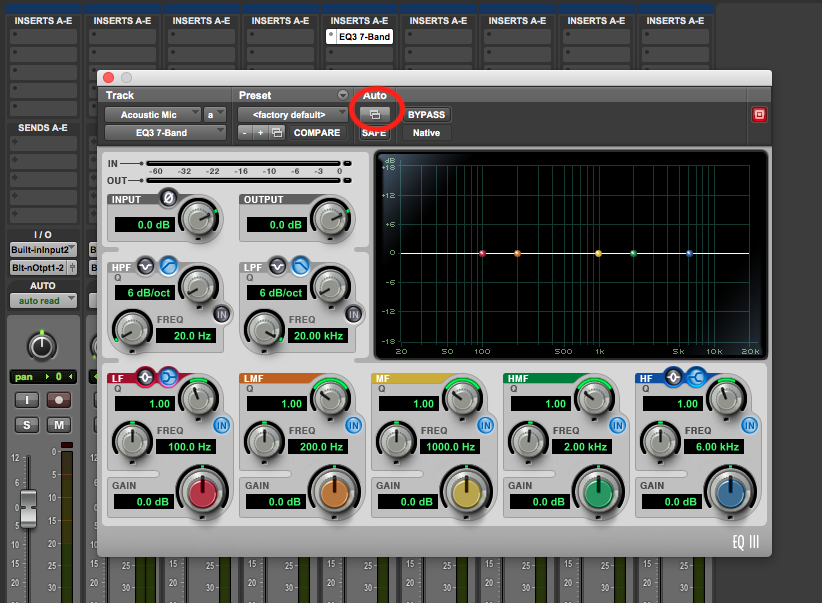
- Enable Write or Touch mode
- In the Mix or Edit window, set the track automation mode to Write, Touch, or Latch depending on how you want to capture movement.
- Display the automation lane
- In the Edit window, click the track’s Track View selector and choose the plugin parameter or “Plug-in” and the specific parameter to show an envelope lane.
- Record the automation
- Play the session and move the plugin control. Pro Tools records the envelope in real time when using Write, Touch, or Latch modes.
- Draw or edit automation manually
- Use the Grabber and Pencil tools in the Edit window to edit points, create ramps, or draw curves for precise control.
- Switch to Read mode
- After writing automation, set the track back to Read mode to prevent accidental overwrites.
- Fine-tune with automation smoothing
- Trim points and use the Trim tool to adjust ranges or apply fades between points for natural transitions.
If you prefer automation without live performance, you can draw envelopes directly:
- Open the Track View and select the plugin parameter.
- Use the Pencil tool to click points and create the exact curve you want.
This method is useful for precise moves like linear fades or exact cutoff sweeps.

Edit window vs. Mix window workflows
Both windows work, but each has strengths.
- Edit window — Best for precise drawing and zoomed-in editing on automation lanes.
- Mix window — Best for live writing and seeing plugin inserts and sends at a glance.
When you learn how to automate a plugin in Pro Tools, use the Edit window for surgical edits and the Mix window for quick adjustments.

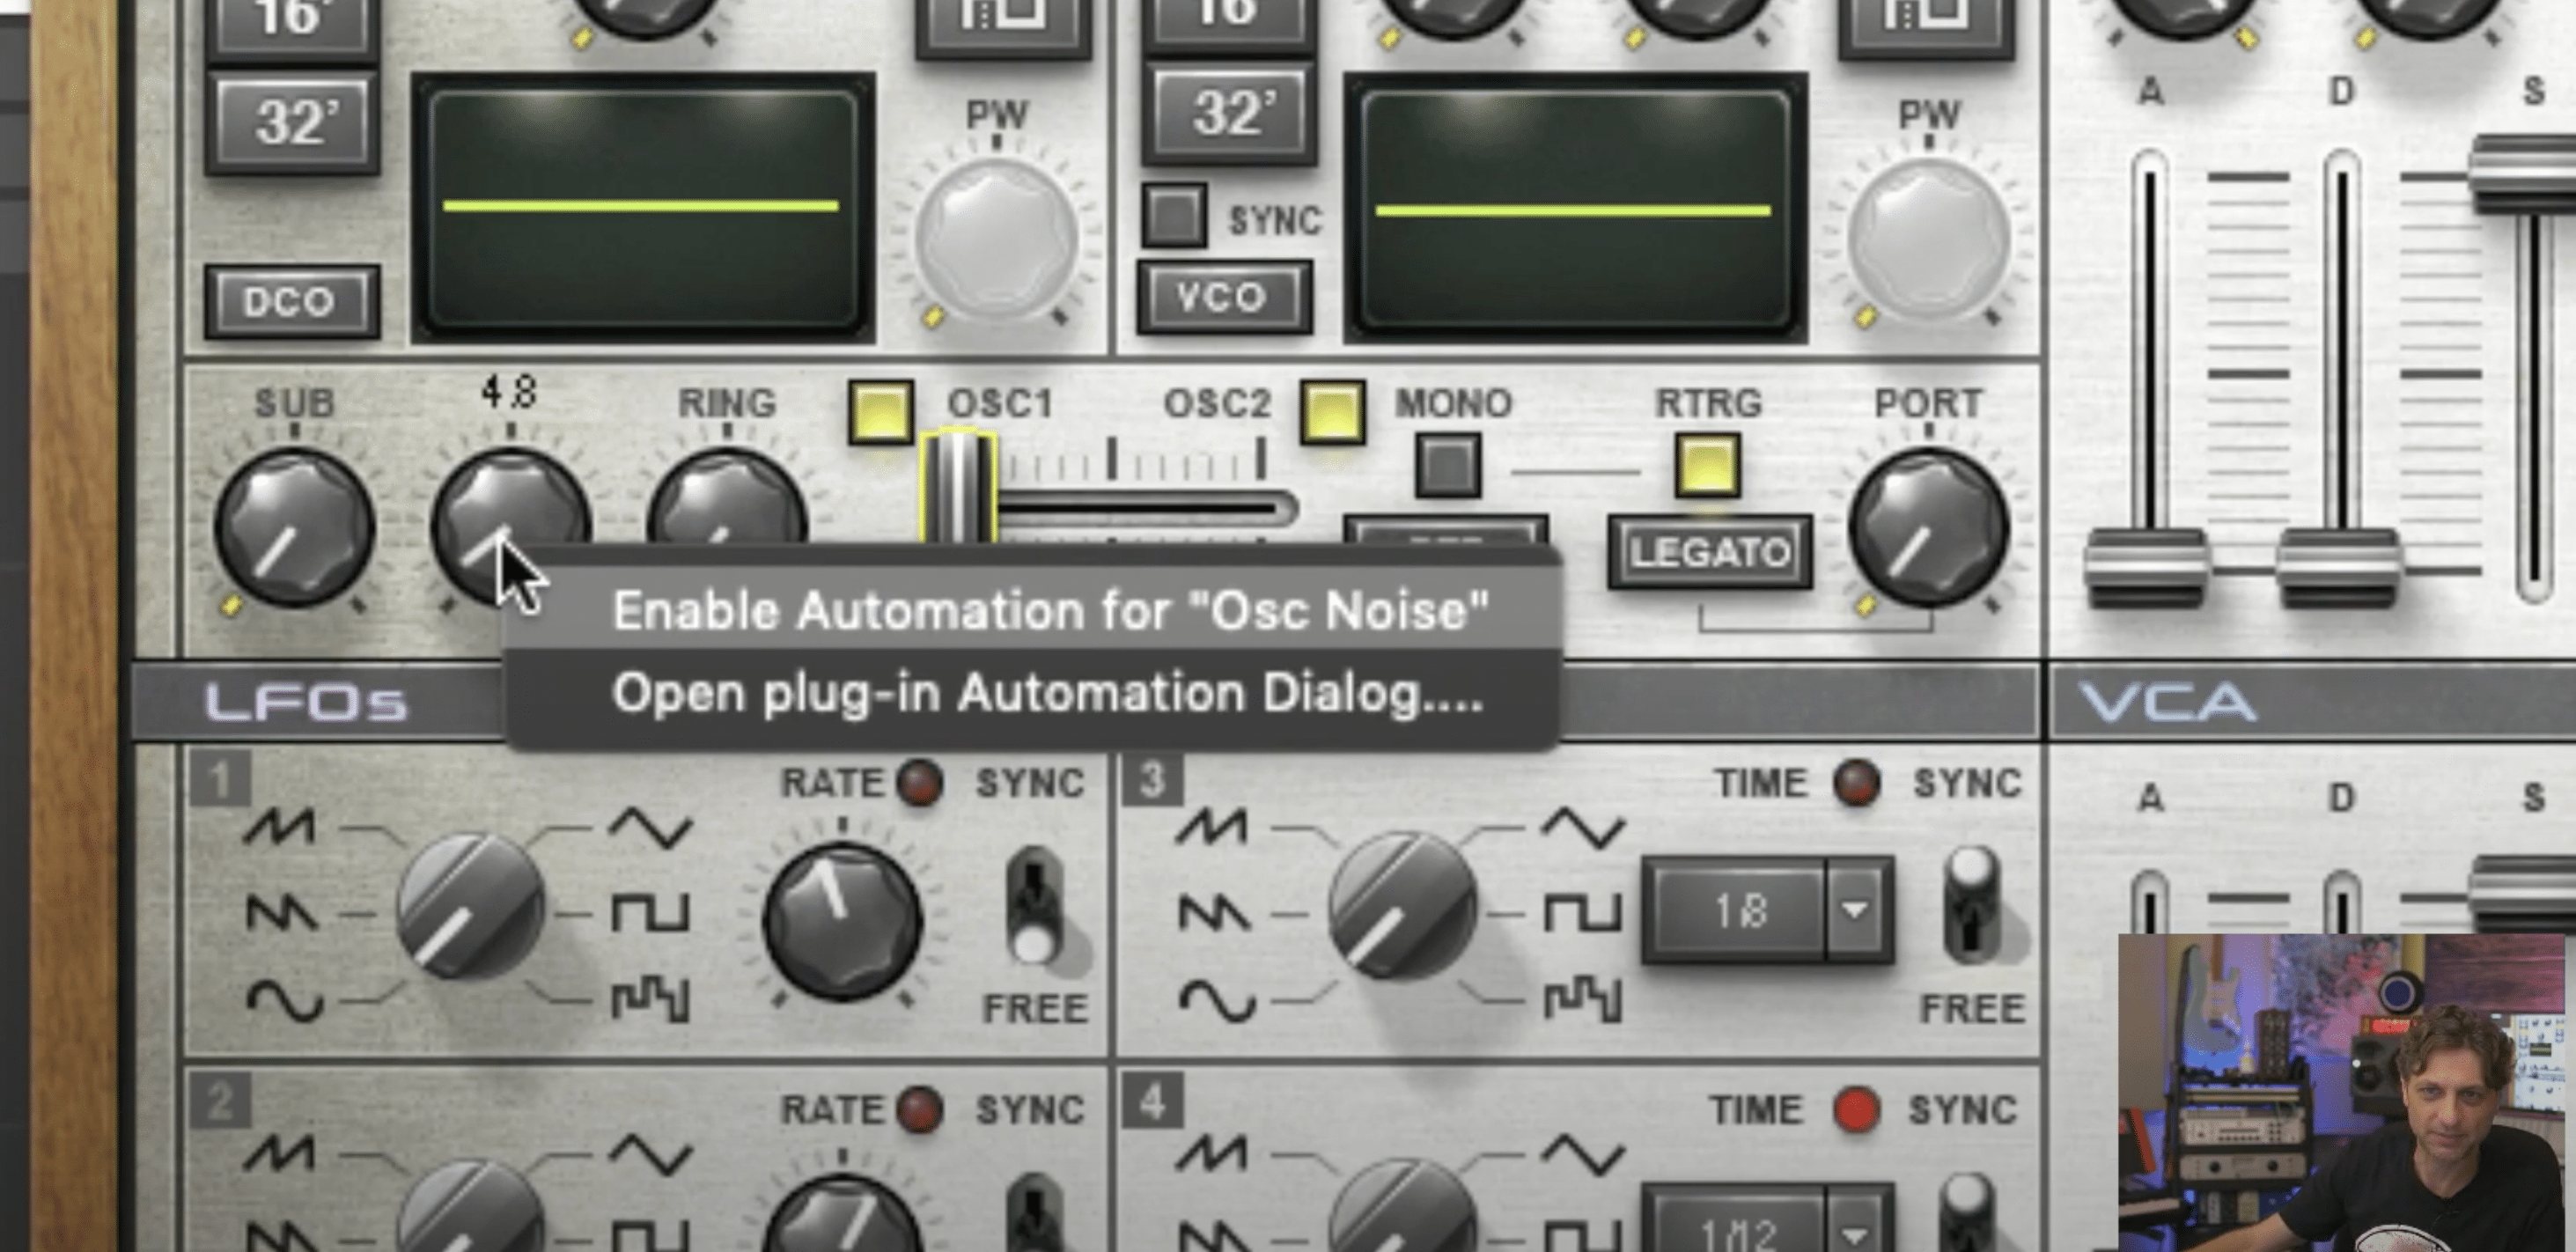
Automating third-party and AAX plugins
Most AAX plugins expose parameters for automation. Some third-party plugins may present parameters differently.
- Check plugin automation mapping
- Open the plugin and look for parameter names that match Pro Tools automation lanes.
- Use Host Automation or MIDI CC when necessary
- For instruments or plugins that do not map directly, route automation via plugin MIDI or host automation features.
- Use plugin-specific automation mapping tools
- Some plugins include their own automation learn feature. Use it to map a control to an automation lane.
When a third-party plugin does not expose a needed parameter, consider automating a macro within the plugin or automating an insert send or track AUX that affects the plugin chain.

Editing, smoothing, and advanced automation techniques
Once recorded, automation often needs polishing. Here are advanced techniques to refine your automation.
- Use the Trim tool for global gain changes
- Trim lets you scale an entire envelope without re-drawing points.
- Collapse or expand automation lanes
- Show only the lanes you need to stay organized.
- Use curve and breakpoint editing
- Create exponential or logarithmic ramps for more natural-sounding parameter changes.
- Use automation playlists
- Save alternate automation passes in different playlists to compare ideas non-destructively.
For vocal rides, use automation to ride plugin thresholds or compressor makeup gain. For synths, automate filter cutoff and resonance for movement. Learning how to automate a plugin in Pro Tools with these techniques helps craft expressive mixes.
Common pitfalls and troubleshooting
Automation can create surprises. Here’s how to avoid common traps.
- Accidentally overwriting automation
- Always return tracks to Read mode after writing.
- Automation not responding in playback
- Confirm parameter lane is enabled and visible. Check plugin supports automation.
- Plugin parameter names changed after update
- Re-map lanes if plugin updates rename parameters.
- CPU spikes when writing automation
- Commit or freeze tracks, or increase buffer size while editing.
If automation appears jerky, zoom in and smooth points or redraw curves to remove sudden jumps. These fixes will improve playback reliability when you automate a plugin in Pro Tools.

Tips from my experience
I have automated hundreds of plugins across many projects. Here are practical tips that saved me time.
- Start small: automate one key parameter per section to avoid over-complex mixes.
- Use automation playlists to test different ideas without fear.
- Record automation with Touch mode for less accidental overwriting.
- When collaborating, consolidate automation by printing effects to audio stems when needed for portability.
- Save a version before bulk automation work. Versioning prevents lost work.
One mistake I made early on was leaving automation in Write mode and overwriting careful edits. That taught me to switch to Read promptly and to use playlists for experimentation.
Frequently Asked Questions of how to automate a plugin in pro tools
What automation modes should I use for plugin automation?
Use Write for first-pass recording, Touch for momentary moves, and Latch for sustained moves. Read prevents any further changes.
Can I automate every plugin parameter in Pro Tools?
Most AAX plugin parameters are automatable. Some third-party plugins may require host mapping or MIDI automation to expose parameters.
How do I draw automation instead of recording it?
In the Edit window select the plugin parameter lane, choose the Pencil tool, and click to create points or draw curves for precise control.
How do I prevent accidental automation overwrites?
Set the track automation mode to Read after recording and use playlists to store alternate automation takes.
Does automating plugins affect CPU load?
Live automation can increase CPU use. Commit or freeze tracks, or increase buffer size while working to reduce load.
Conclusion
Automating plugins in Pro Tools is a core skill that lets you shape dynamics and bring mixes to life. You now have a clear, practical path for how to automate a plugin in Pro Tools, from enabling modes and recording envelopes to editing lanes and solving common problems. Start with small, focused automation moves, save versions often, and experiment with playlists to refine your sound. Try these steps in your next session, share what you create, and subscribe or comment to continue the conversation.